
1. Navigate to https://www.quantaco.co/
2. Click "LOGIN"

Access the Credit Card Reconciliation Page
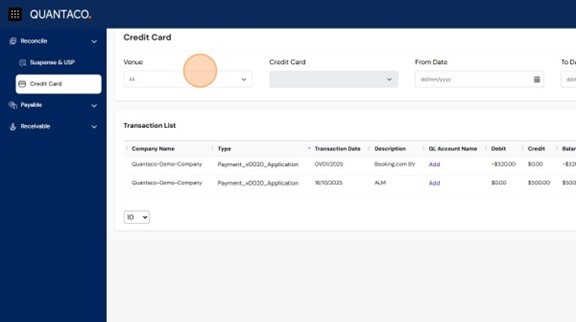
4. From your QFinance dashboard, click the left navigation bar. Under the Reconcile group, select Credit Card.
Apply Filters
5. At the top of the page, you’ll see four filters designed to help you refine your view:
- Venue
- Credit Card
- From Date
- To Date
- Select the Venue to view transactions for a specific location.
- Choose the Credit Card you wish to reconcile.
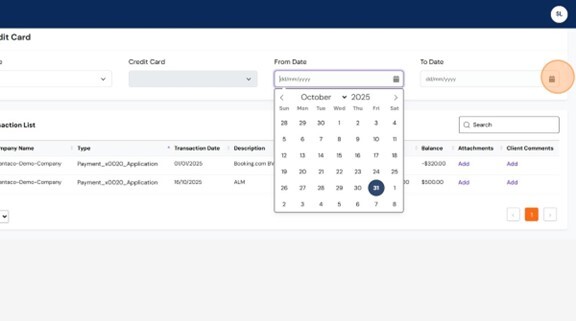
- Apply a Date Range to narrow the period displayed.
Search for Specific Transactions
6. Use the below filters to find transactions by:- Description
- Date
- Amount

Assign GL Accounts
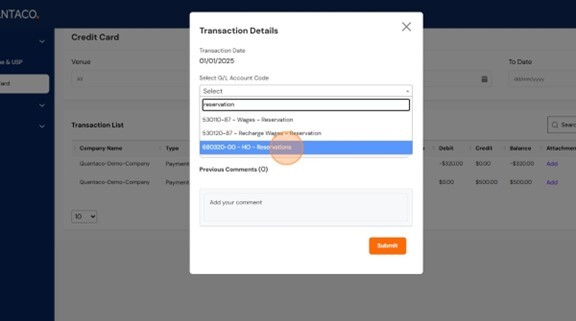
7. For each transaction, locate the GL Account. Click the dropdown and select the appropriate account for that transaction.
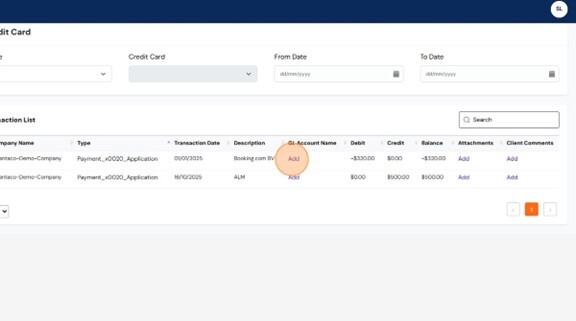
This ensures each transaction is properly coded for reporting and reconciliation. If the correct GL account does not appear in the dropdown, contact your finance administrator to have it added.
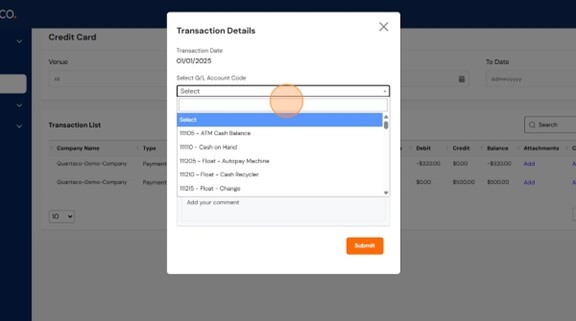
- Click "Select"
- Type in the search field to filter available GL accounts.
- For example, select 680320-00 - HO - Reservations
Add Attachments and Comments
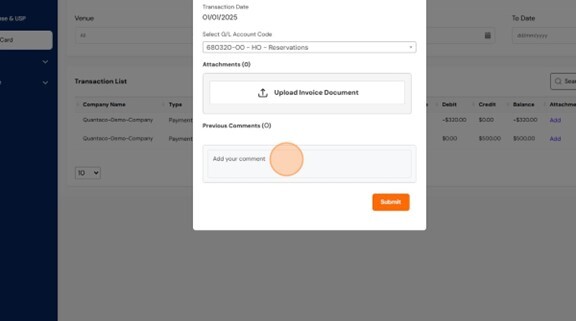
8. To upload supporting documentation for these transactions:- Upload supporting documents (receipts, invoices, etc. — maximum 50MB).
- Add comments or explanations to clarify the transaction.
Review and Complete
9. To finalise and review:
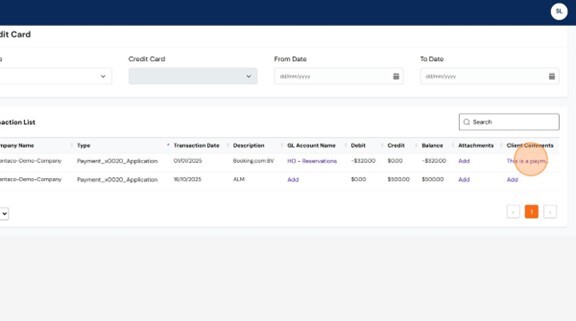
- Double-check all reconciled transactions for accuracy.
- Ensure all attachments and comments are uploaded.
- Once complete, your reconciliation will provide full transparency and alignment with Quantaco.
Need help? If you encounter any issues during reconciliation, contact your Quantaco support team or visit the QFinance Help Centre for further guidance.
You’ve now completed the Credit Card Reconciliation module!You can now confidently manage your venue’s card transactions in QFinance—streamlining manual reconciliation, improving visibility, and ensuring complete financial accuracy.